왜 세 번인가Why Three Times?
클리커(방치형) 게임을 연습용으로 세 번 만들었다. 같은 장르를 반복한 이유는 단순하다. 코어 루프가 단순해서 그 위에 올릴 것을 바꿔 가며 시험하기 좋았다. 클릭하면 재화가 오르고, 시간이 지나도 오르고, 그 재화로 뭔가를 올린다. 이 뼈대는 세 번 다 같다.
I built three separate clicker (idle) games for practice. The reason for repeating the same genre is simple: the core loop is small enough that I could swap out what I was practicing on top of it. Click to gain currency, wait to gain currency over time, spend currency to upgrade stats. That skeleton stayed identical across all three.
| 엔진 | 무엇을 연습했나 | |
|---|---|---|
| 1번째 | Unity 2018.3.12f1 | 유니티 기초 동작 원리와 클리커 장르의 기본 시스템 |
| 2번째 | Unity 2019.4.4f1 | UI 상호작용과 상태(버프/디버프)에 따른 로직 제어 — 골드메탈 유튜브 강좌를 따라가며 제작 |
| 3번째 | Unity 2018.3.14f1 | 객체지향적인 코드 구조와 게임 상태 관리(FSM) |
| Engine | What I Practiced | |
|---|---|---|
| 1st | Unity 2018.3.12f1 | Unity basics and core clicker mechanics (save/load, timers) |
| 2nd | Unity 2019.4.4f1 | UI interaction and buff/debuff state logic — built by following a Goldmetal YouTube tutorial |
| 3rd | Unity 2018.3.14f1 | Object-oriented code structure, separated managers, and game state management (FSM) |
셋 다 1인 개발이고 전부 완성했다. 아래에 각각 무엇을 만들었고 코드가 어떻게 달라졌는지 적는다.
All three were solo projects and all three were completed. Below is what I built in each iteration and how the code changed.
1번째 — 일단 돌아가게1st Attempt — Just Make It Work
오브젝트를 터치하면 골드를 얻고, 시간이 지나면 자동으로도 얻고, 그 골드로 능력치를 올린다. 여기에 데이터 저장과 광고 보상까지 붙였다. UI 그림은 그림판으로 직접 그려 썼다.
Tap the screen to earn gold, earn gold automatically every second, and spend it to upgrade stats. I also wired up local save data and rewarded ads. I drew all the UI art myself in MS Paint.
데이터를 어떻게 들고 있나How Data Was Stored
싱글톤 DataController 를 두고, 게임 데이터를 JSON으로 로컬에 저장·로드했다.
I used a singleton DataController to save and load game data locally as JSON.
public void LoadGameData()
{
    string filePath = Application.persistentDataPath + gameDataProjectFilePath;

    if (File.Exists(filePath))
    {
        string dataAsJson = File.ReadAllText(filePath);
        _gameData = JsonUtility.FromJson<GameData>(dataAsJson);
    }
    else
    {
        _gameData = new GameData();
        _gameData.CollectGoldLevel = 1;
        _gameData.GoldPerSec = 1;
        _gameData.Gold = 0;
        _gameData.Health = 100;
        _gameData.Damage = 20;
        _gameData.Level = 1;
        _gameData.Exp = 0;
    }
}Application.persistentDataPath 는 플랫폼마다 다른 그 경로를 대신 골라 준다. 안드로이드면 앱 전용 저장소, 윈도우면 사용자 폴더 아래다. 경로를 직접 적으면 다른 플랫폼에서 바로 깨진다.Application.persistentDataPath resolves to the right writable path on each OS—app-specific storage on Android, and the user's AppData folder on Windows. Hardcoding file paths breaks as soon as you switch platforms.클릭과 자동 생산Clicking and Passive Gold Generation
void Update()
{
    if (Input.GetMouseButtonDown(0))
    {
        DataController.Instance.gameData.Gold += DataController.Instance.gameData.GoldPerSec;
        TextGold.text = DataController.Instance.gameData.Gold.ToString();

        Ray ray = MainCamera.ScreenPointToRay(Input.mousePosition);
        RaycastHit hit;
        if (Physics.Raycast(ray, out hit, 100f))
        {
            Instantiate(EffectSpark, hit.point, EffectSpark.transform.rotation);
            MainCamera.gameObject.GetComponent<AudioSource>().PlayOneShot(SFXClick);
        }
    }
}

IEnumerator StartCollectGold()
{
    while (true)
    {
        yield return new WaitForSecondsRealtime(1f);
        DataController.Instance.gameData.Gold += DataController.Instance.gameData.GoldPerSec;
        TextGold.text = DataController.Instance.gameData.Gold.ToString();
    }
}
클릭 처리는 Update 에서, 자동 생산은 코루틴에서 한다. WaitForSecondsRealtime 을 쓴 건 Time.timeScale 을 0으로 만들어도 시간이 계속 흐르게 하기 위해서다.
Clicks are handled in Update, while passive income runs in a coroutine. I used WaitForSecondsRealtime so passive gold would keep ticking even if Time.timeScale was set to 0.
지금 이 코드를 읽으면Looking Back at This Code Now
- 클릭으로 얻는 양이
GoldPerSec다. 초당 획득량을 클릭 보상에도 그대로 쓰고 있다. 둘을 따로 올리고 싶어지는 순간 이름과 용도가 어긋난다. - UI 위를 눌러도 클릭으로 센다.
Input.GetMouseButtonDown만 보기 때문에 버튼을 누른 손가락이 뒤쪽 게임 화면까지 두드린다. 이건 세 번째 프로젝트에서 고쳐진다. GetComponent<AudioSource>()를 클릭할 때마다 호출한다. 캐싱해 두면 되는 부분이다.- 골드가 오를 때마다
ToString()을 부른다. 자동 생산이 1초에 한 번이라 부담은 작지만, 초당 획득량이 커져 갱신이 잦아지면 문자열 할당이 계속 쌓인다.
- Clicking grants
GoldPerSec. I reused the passive income variable as the click reward. The moment you want to upgrade click power separately from idle income, the variable name stops making sense. - Clicking UI buttons also triggers a game click. Because it only checks
Input.GetMouseButtonDown(0), tapping an upgrade button also registers a tap on the game world behind it. This gets fixed in the third project. - Calling
GetComponent<AudioSource>()on every click. That reference should be cached once at startup. - Calling
ToString()every time gold changes. Once per second is harmless, but when rapid clicks and ticks pile up, repeated string allocations add unnecessary GC pressure.
2번째 — 컨셉을 얹다2nd Attempt — Adding a Theme and Concept
유튜버(스트리머)를 성장시키는 컨셉의 프로토타입이다. 클릭만 있던 자리에 일정 관리가 들어간다. 월·주 단위 캘린더가 있고, 캐릭터에게 컨디션과 멘탈 수치가 있고, 골드와 팔로워가 따로 오른다.
This prototype uses a streamer/YouTuber simulation theme. Where the first game only had tapping, this one adds weekly schedule management, condition and mental stamina gauges, and separate gold and follower counts.
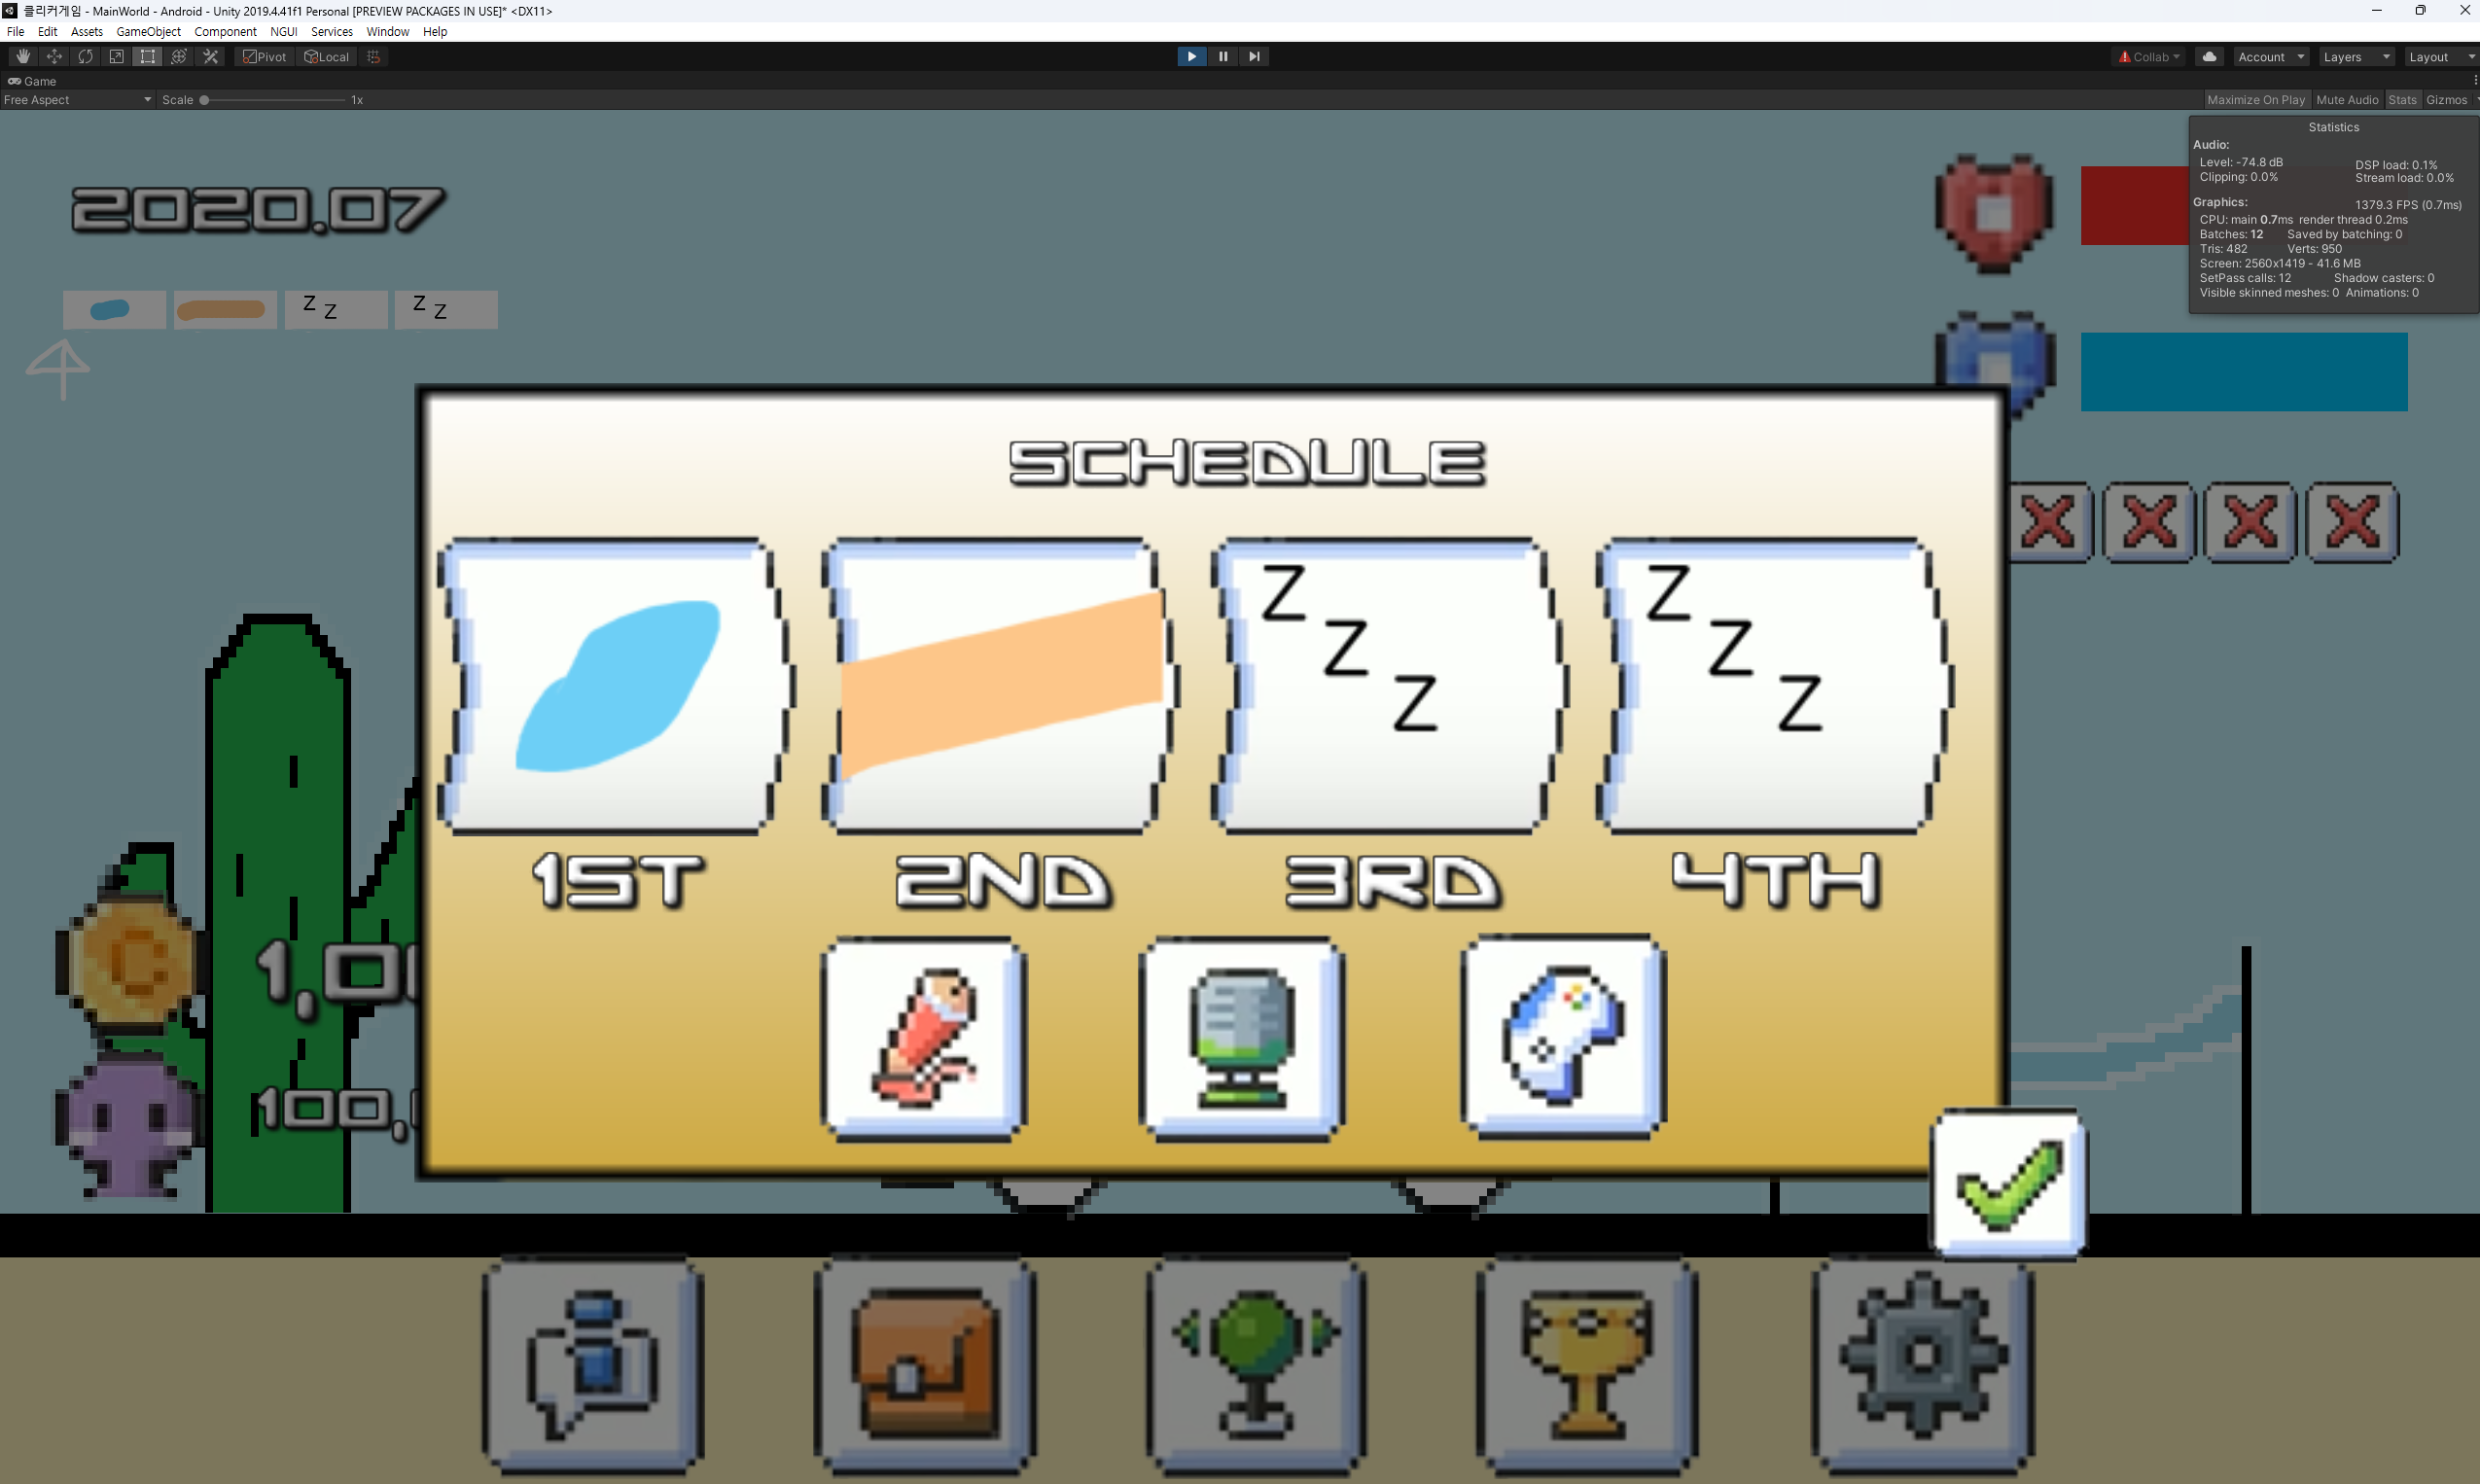
행동은 세 가지다. 방송(Game) · 노래(Sing) · 그림(Draw). 무엇을 하느냐에 따라 소모되는 컨디션이 다르고, 캐릭터가 앉는 위치와 애니메이션도 달라진다.
There are three main activities: Streaming (Game), Singing (Sing), and Drawing (Draw). Each consumes a different amount of stamina and moves the character to a different spot with its own animation.
switch (schedules[week])
{
    case "DRAW":
        Vector2 waterPos = GameObject.Find("의자").GetComponent<Transform>().position;
        player.transform.position = waterPos;
        playerAnimator.SetBool("물", true);
        playerAnimator.SetBool("밀기", false);
        playerAnimator.SetBool("쉬기", false);
        Status_Manager.Consume("CONDITION", 20f);
        break;
    case "SING":
        // ... (위치 0f 이동 및 밀기 애니메이션)
        Status_Manager.Consume("CONDITION", 15f);
        break;
    case "GAME":
        // ... (침대 위치 이동 및 쉬기 애니메이션)
        Status_Manager.Consume("CONDITION", 10f);
        break;
}
switch (schedules[week])
{
case "DRAW":
Vector2 waterPos = GameObject.Find("의자").GetComponent<Transform>().position;
player.transform.position = waterPos;
playerAnimator.SetBool("물", true);
playerAnimator.SetBool("밀기", false);
playerAnimator.SetBool("쉬기", false);
Status_Manager.Consume("CONDITION", 20f);
break;
case "SING":
// ... (move to position 0f and play push animation)
Status_Manager.Consume("CONDITION", 15f);
break;
case "GAME":
// ... (move to bed position and play rest animation)
Status_Manager.Consume("CONDITION", 10f);
break;
}switch statement, tuning game balance requires editing the script. Following along with this code was the first time I consciously asked myself, "Where should balance numbers actually live?"지치면 눕는다Collapsing When Exhausted
컨디션이 0이 되면 isTired 디버프에 들어간다. 회복하려면 자거나 숨을 골라야 한다. 재미있는 건 눕는 동작을 위해 콜라이더 크기까지 바꾼다는 점이다.
When stamina hits 0, the character enters the isTired debuff state and has to sleep or rest to recover. One neat detail is that lying down also resizes the character's BoxCollider2D.
public static void PlayerSleep()
{
    isSleep = true;

    GameObject player = GameObject.FindGameObjectWithTag("Player");
    BoxCollider2D collider = player.GetComponent<BoxCollider2D>();
    collider.size = new Vector2(0.7f, 0.3f); // 누운 상태 콜라이더 조정

    Vector2 bedPos = GameObject.Find("침대").GetComponent<Transform>().position;
    player.transform.position = bedPos;

    Animator playerAnimator = player.GetComponent<Animator>();
    playerAnimator.SetBool("isSleep", isSleep);
    playerAnimator.SetTrigger("doSleep");

    // 행동 진행도 UI 숨김 처리
    GameObject totalActiveBar = GameObject.Find("Active_Bar_Sprite");
    totalActiveBar.transform.localScale = Vector3.zero;
}
public static void PlayerSleep()
{
isSleep = true;
GameObject player = GameObject.FindGameObjectWithTag("Player");
BoxCollider2D collider = player.GetComponent<BoxCollider2D>();
collider.size = new Vector2(0.7f, 0.3f); // Resize collider for lying-down posture
Vector2 bedPos = GameObject.Find("침대").GetComponent<Transform>().position;
player.transform.position = bedPos;
Animator playerAnimator = player.GetComponent<Animator>();
playerAnimator.SetBool("isSleep", isSleep);
playerAnimator.SetTrigger("doSleep");
// Hide the activity progress bar UI
GameObject totalActiveBar = GameObject.Find("Active_Bar_Sprite");
totalActiveBar.transform.localScale = Vector3.zero;
}서 있을 때와 누워 있을 때 클릭 판정 영역이 같으면 안 되기 때문이다. 스프라이트만 바꾸고 콜라이더를 그대로 두면 누웠는데 머리 위 허공이 눌리는 상황이 생긴다.
A standing character and a lying character should not share the same click hitbox. If you swap the sprite without resizing the collider, tapping the empty air above the sleeping character's head still registers as a hit.
여기서도 보이는 것What Stands Out in This Code Too
GameObject.Find("의자"),Find("침대")를 호출 시점마다 부른다. 이름으로 씬 전체를 훑는 방식이라 오브젝트가 늘수록 느려지고, 이름을 바꾸면 조용히null이 된다.[SerializeField]로 미리 연결해 두면 둘 다 막힌다.- 애니메이터 파라미터 이름이 한글이다.
"물","밀기","쉬기". 동작하지만 나중에 이 코드만 봐서는 무슨 상태인지 알기 어렵다. - UI를
localScale = zero로 숨긴다.SetActive(false)와 달리 오브젝트는 살아 있어서 컴포넌트가 계속 돈다. 반대로 다시 켤 때 레이아웃 재계산이 없다는 장점도 있다.
- Calling
GameObject.Find("의자")andFind("침대")every time the method runs. Searching the entire hierarchy by string is slow and silently breaks if anyone renames an object in the scene. Wiring references via[SerializeField]prevents both issues. - Korean strings for Animator parameter names (
"물","밀기","쉬기"). It works, but reading the code later gives little clue what those animation states actually represent. - Hiding UI by setting
localScale = Vector3.zero. UnlikeSetActive(false), the GameObject stays active and its components keep running every frame—though it does avoid a UI layout rebuild when shown again.
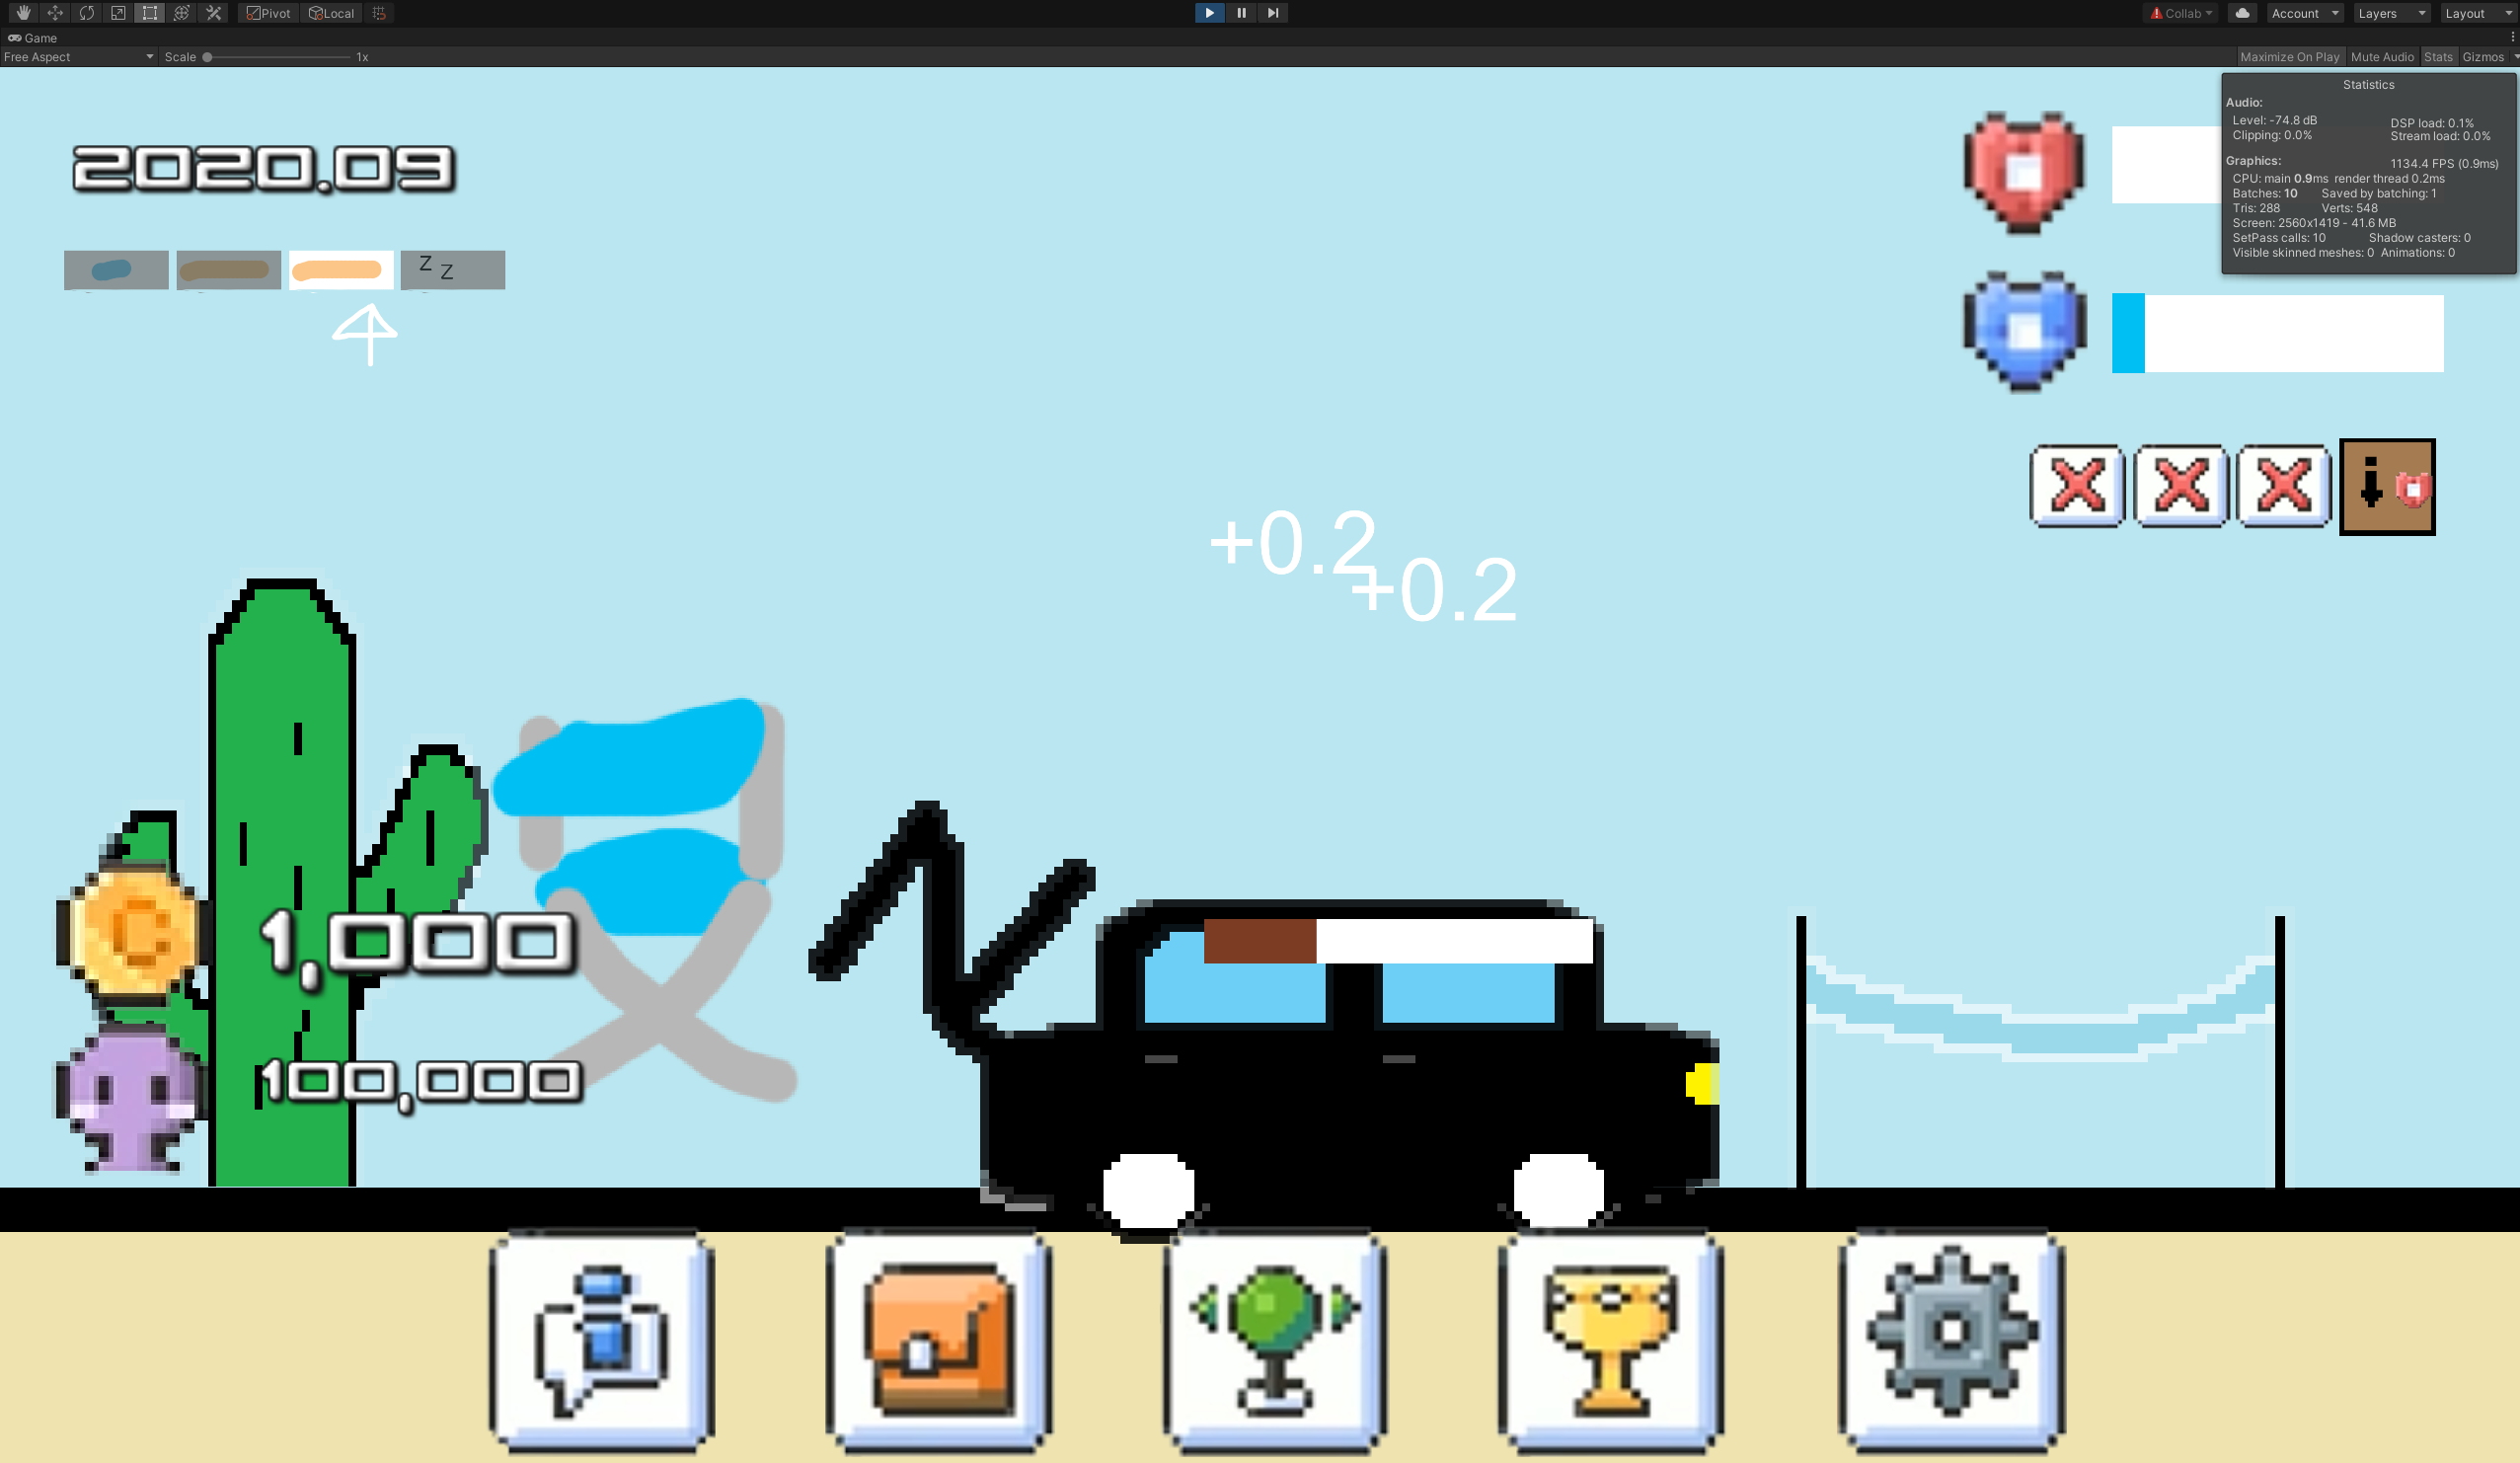
코드와 시스템 구성은 강좌를 따라갔지만, 화면에 보이는 그림은 일부 UI를 빼면 그림판으로 직접 그렸다. 전문 도트 툴을 쓴 게 아니라 마우스로 한 칸씩 찍은 것에 가깝다.
While the code followed the tutorial, almost all of the on-screen pixel art (aside from a few UI elements) was drawn by hand in MS Paint, clicking pixel by pixel with a mouse.
3번째 — 구조를 나누다3rd Attempt — Separating the Architecture
세 번째는 목표 자체가 달랐다. "기능이 돌아가게 짜는 수준을 넘어서 보자" 였다. 그래서 만든 것이 공용 연산 유틸리티, 게임 상태 머신, 매니저 분리다.
For the third game, my goal was different: "Let's move past writing code that merely works." That led to shared math utilities, a dedicated game state machine, and separated manager classes.
데미지 계산을 한곳으로Centralizing Damage Calculation
static public void CalcDamage(Unit attacker, Unit target)
{
    float attack = attacker.GetStatData(EStatsIndex.Attack);
    bool critical = false;
    float damageRatio = 1;

    // 크리티컬 확률 연산 (레벨 비례)
    float attackerCriticalValue = attacker.GetStatData(EStatsIndex.Critical);
    float attackerCriticalValueRatio = Util.CalcRatioValue(attackerCriticalValue, target.Level);
    if (attackerCriticalValueRatio <= 0) attackerCriticalValueRatio = 0;

    if (Util.IsSuccessChance(attackerCriticalValueRatio))
    {
        damageRatio *= 1.5f;
        critical = true;
    }

    // 방어력 연산 (레벨 비례 데미지 감소)
    float defence = target.GetStatData(EStatsIndex.Defense);
    float defenceLevelRatio = Util.CalcRatioValue(defence, attacker.Level);
    damageRatio *= (1 - defenceLevelRatio);

    int damage = (int)(attack * damageRatio);
    target.SetDamage(damage, critical);
}
static public void CalcDamage(Unit attacker, Unit target)
{
float attack = attacker.GetStatData(EStatsIndex.Attack);
bool critical = false;
float damageRatio = 1;
// Critical hit chance calculation (scaled by target level)
float attackerCriticalValue = attacker.GetStatData(EStatsIndex.Critical);
float attackerCriticalValueRatio = Util.CalcRatioValue(attackerCriticalValue, target.Level);
if (attackerCriticalValueRatio <= 0) attackerCriticalValueRatio = 0;
if (Util.IsSuccessChance(attackerCriticalValueRatio))
{
damageRatio *= 1.5f;
critical = true;
}
// Defense mitigation calculation (scaled by attacker level)
float defence = target.GetStatData(EStatsIndex.Defense);
float defenceLevelRatio = Util.CalcRatioValue(defence, attacker.Level);
damageRatio *= (1 - defenceLevelRatio);
int damage = (int)(attack * damageRatio);
target.SetDamage(damage, critical);
}Unit 두 개를 받아 계산한다. 누가 때리든 누가 맞든 같은 함수를 쓴다. 플레이어가 적을 때릴 때도, 적이 플레이어를 때릴 때도 마찬가지다. 1번째에서 클릭 처리 안에 재화 계산이 섞여 있던 것과 대비된다.
CalcDamage takes two Unit instances. Whether the player hits an enemy or an enemy hits the player, the exact same function runs. That is a sharp contrast to the first project, where currency math was embedded directly inside the mouse-click handler.
UI 위를 눌렀는지 먼저 본다Checking for UI Clicks First
public void ProcessTouch()
{
    // UI 터치 방지
    if (EventSystem.current.IsPointerOverGameObject()) return;

    if (GameStateMachineManager.Instance.IsCurrState(EGameState.Battle) == false
        && GameStateMachineManager.Instance.IsCurrState(EGameState.BossBattle) == false)
        return;

    if (Input.GetMouseButtonDown(0) == false) return;

    Vector3 touchPos = Input.mousePosition;
    Vector3 worldPos = Camera.main.ScreenToWorldPoint(new Vector3(touchPos.x, touchPos.y, 50));

    // 이펙트 생성 및 효과음 재생
    GameObject effectObject = ResourceManager.Instance.ClonePrefab("Effect/HitEffect");
    effectObject.transform.position = worldPos;
    SoundManager.Instance.PlayActionSound("Peok");

    // 공격 판정
    Util.CalcDamage(UnitManager.Instance.Player, UnitManager.Instance.Enemy);
}
public void ProcessTouch()
{
// Ignore touches over UI elements
if (EventSystem.current.IsPointerOverGameObject()) return;
if (GameStateMachineManager.Instance.IsCurrState(EGameState.Battle) == false
&& GameStateMachineManager.Instance.IsCurrState(EGameState.BossBattle) == false)
return;
if (Input.GetMouseButtonDown(0) == false) return;
Vector3 touchPos = Input.mousePosition;
Vector3 worldPos = Camera.main.ScreenToWorldPoint(new Vector3(touchPos.x, touchPos.y, 50));
// Spawn hit effect and play sound
GameObject effectObject = ResourceManager.Instance.ClonePrefab("Effect/HitEffect");
effectObject.transform.position = worldPos;
SoundManager.Instance.PlayActionSound("Peok");
// Apply attack damage
Util.CalcDamage(UnitManager.Instance.Player, UnitManager.Instance.Enemy);
}EventSystem.current.IsPointerOverGameObject() 와 그다음 상태 검사. 1번째에서 UI를 눌러도 게임 화면이 같이 눌리던 문제가 여기서 막힌다. 그리고 지금이 전투 상태인지부터 확인하므로, 로딩 중이나 결과 화면에서 두드려도 아무 일이 없다. 같은 장르를 세 번 만들면서 실제로 달라진 건 이런 것들이다.EventSystem.current.IsPointerOverGameObject() and the game-state check right below it. The click-through bug from the first project is stopped right here. And because it verifies that the game is actually in Battle or BossBattle state, tapping during loading or result screens does nothing. Those two guard clauses are the concrete difference that came from repeating the genre.이펙트도 Instantiate 를 직접 부르지 않고 ResourceManager 를 거치고, 효과음도 SoundManager 를 거친다. 1번째에서 MainCamera 의 AudioSource 를 매번 찾아 쓰던 것과 다르다.
Spawning hit effects now goes through ResourceManager, and audio goes through SoundManager—instead of calling MainCamera.gameObject.GetComponent<AudioSource>() on every tap like the first game did.
저장을 다시Reworking Save Serialization
static public void SaveBinaryFormat(string key, object data)
{
    string jsonData = Util.JsonSerializeObject(data);

    BinaryFormatter b = new BinaryFormatter();
    MemoryStream m = new MemoryStream();
    b.Serialize(m, jsonData);

    PlayerPrefs.SetString(key, Convert.ToBase64String(m.GetBuffer()));
}
1번째는 JSON을 파일로 그냥 썼다. 세 번째는 JSON으로 직렬화한 뒤 Binary로 인코딩해 PlayerPrefs 에 넣는다. 클리커 게임은 데이터가 곧 진행도라 저장을 신경 쓴 것이다.
The first game wrote plain-text JSON to a file. The third game serializes to JSON, encodes it via BinaryFormatter into Base64, and stores it in PlayerPrefs so players could not trivially edit their gold in Notepad.
- Base64는 암호화가 아니라 인코딩이다. 열어 보면 못 읽지만 되돌리는 건 누구나 할 수 있다. 진짜로 막으려면 해시나 서버 검증이 필요하다.
m.GetBuffer()는 실제 데이터보다 길 수 있다.MemoryStream의 내부 버퍼 전체(용량)를 돌려주기 때문에 뒤쪽에 쓰지 않은 0바이트가 붙는다.ToArray()를 쓰면 실제 길이만 나온다.
- Base64 is encoding, not encryption. It stops casual text editing, but anyone who Base64-decodes the string can read and modify the JSON. Real tamper protection requires hashing, encryption, or server validation.
m.GetBuffer()can be longer than the actual payload. It returns the underlying buffer array including unused capacity (trailing zero bytes). Callingm.ToArray()returns only the written bytes.
세 번 만들면서 달라진 것What Changed Across the Three Versions
| 1번째 | 2번째 | 3번째 | |
|---|---|---|---|
| 클릭 처리 | Update 에서 직접 | 2D Raycast + 이펙트 코루틴 | 상태 검사 후 ProcessTouch |
| UI 위 클릭 | 구분 없음 | isActiveUI 플래그로 일부 차단 | EventSystem 으로 차단 |
| 데이터 | DataController 싱글톤 + JSON 파일 | Status_Manager 정적 메서드 | Json → Binary → PlayerPrefs |
| 연산 | 각 함수 안에 흩어짐 | 매니저별로 나뉨 | Util 로 공용화 |
| 상태 | 없음 | isTired / isSleep 불리언 | FSM (Ready / Battle / BossBattle) |
| 리소스 | 그림판으로 직접 그림 | 일부 UI 외에는 그림판으로 직접 그림 | 인터넷에서 구한 리소스 |
| 1st | 2nd | 3rd | |
|---|---|---|---|
| Click Handling | Directly inside Update | 2D Raycast + effect coroutine | State check + ProcessTouch |
| Clicks Over UI | No filtering | Partially blocked via isActiveUI flag | Blocked via EventSystem |
| Data Persistence | DataController singleton + JSON file | Status_Manager static methods | JSON → Binary → PlayerPrefs |
| Math / Formulas | Scattered inside handlers | Split per manager | Centralized in Util |
| State Management | None | isTired / isSleep booleans | FSM (Ready / Battle / BossBattle) |
| Art Assets | Drawn in MS Paint | Drawn in MS Paint (except some UI) | Free online assets |
정리Wrap-Up
세 프로젝트의 회고를 각각 한 줄로 줄이면 이렇게 된다.
Summarizing each of the three projects in a single line:
- 1번째 — 데이터의 영속성(Save/Load), 코루틴 타이머, UI 탭 전환 같은 뼈대가 되는 기술을 실습했다.
- 2번째 — 골드메탈 유튜브 강좌를 따라가며 스케줄·스탯·디버프가 어떻게 엮이는지 보고, 그림을 직접 그리고, 시각적 피드백을 어떻게 구성해야 하는지 이해했다.
- 3번째 — Manager와 Util을 분리하고 FSM을 체계화하며 구조적인 프로그래밍 방식을 학습했다.
- 1st — Practiced the foundational mechanics: JSON save/load persistence, coroutine timers, and UI tab switching.
- 2nd — Followed Goldmetal's YouTube tutorial to see how schedules, stats, and debuffs interlock, drew custom pixel art, and learned how to layer visual feedback.
- 3rd — Separated Managers and
Utilclasses and introduced an FSM to practice structured code organization.
돌아보면 같은 게임을 세 번 만든 게 아니다. 같은 코어 루프 위에 매번 다른 층을 올려 본 것에 가깝다. 첫 번째에서 넘어간 것(UI 클릭 관통)이 세 번째에서 두 줄로 막히는 걸 보면, 반복이 헛돈 건 아니었다고 생각한다.
Looking back, I did not just build the same game three times—I kept the core loop fixed so I could focus on a different layer each time. Seeing the UI click-through bug from the first project solved cleanly in two lines in the third project showed me that the repetition paid off.
두 번째를 강좌로 따라간 것도 결과적으로는 도움이 됐다. 혼자 짤 때는 나오지 않았을 구성(스케줄·스탯·디버프가 서로 물리는 방식)을 한 번 통과해 본 다음이라, 세 번째에서 무엇을 나눠야 하는지가 조금 더 분명하게 보였다.
Following a tutorial for the second one helped too. Experiencing a more complex feature set (schedules, stamina, and debuffs interacting) made it much clearer in the third project which responsibilities needed to be split apart.